


Introduction
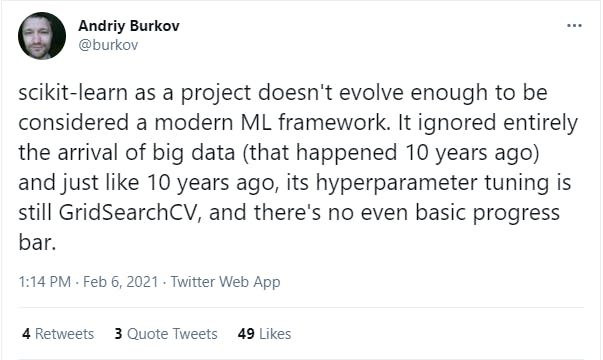
Hello AI Enthusiasts, in this post we will understand the basics of GPU. Then we will discuss the Libraries which we can use for classical ML algorithm e.g. LinearRegression. Why classical only, because Deep Learning models are inherently GPU supported e.g Tensorflow. A traditional ML library i.e. scikit-learn doesn't have GPU support neither it is in pipeline. Remember this thread from Twitter,
Before checking the Library, we will try to understand the need and working of the GPU.
How GPU helps
Before understanding the GPU, let's quickly understand the CPU in few lines.
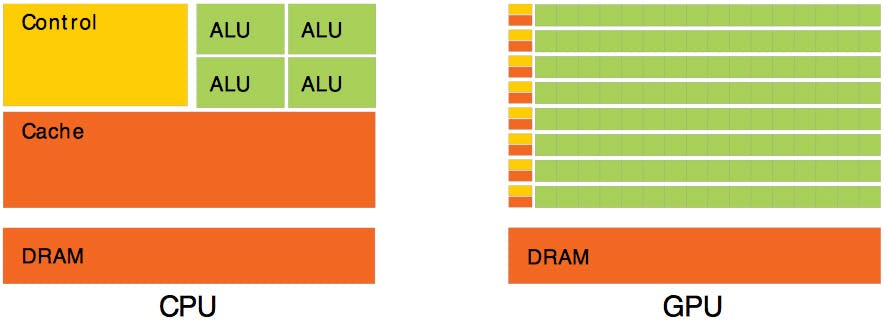
- The CPU is a general-purpose processor i.e. it can run a Game, a Browser, Video etc.
- It contains one ALU[Arithmetic Logic Unit] per core. It does all the calculations
- Control unit instructs the ALU/Memory sequentially(per core)
- It is not designed for any specific type of task
Since it is too general-purpose, it has no idea what the next instruction can be. So it read the instruction every time from the program. This is the point that is Traded-Off in GPU and even further with TPU.
The GPU, - Contains 2000-5000 ALU to do the calculations in parallel
- But its communication with the CPU is expensive i.e. add to latency
So, the bigger the calculation we sent to GPU better the Throughput/Latency ratio.
It gives a huge improvement over CPU for Neural Network by computing the millions of Tensor multiplications/ addition in parallel.
Parallelizable
So, in summary, a CPU can do relatively smaller calculations in parallel (throughput) but it can handle complex control logic i.e. branching/switching.
On the other hand, a GPU can do a massive amount of calculation in parallel but it is not good at handling complex logic. Just like the CPU, GPU too has its own memory. This helps GPU to improve latency(i.e. fewer calls to CPU for data).
But the point that is worth a mention is that, someone needs to think of the logic to parallelize the pieces of stuff to utilize GPU cores. In the case of Deep Learning, it is a bit simple because it is mainly a task of Tensor Multiplication and addition.
Unlike Deep Learning, in the case of classic Machine Learning, all the algorithms have a different technique to fit the data and to find the solution. So, in this case, we need case-specific code/logic to enable parallel operations and utilize the GPU.
For example, In Gradient Boosting one of the tasks that is parallelized is to sort each feature while finding the best splits.
That's why we will use the available Modules which supports GPU for ML
NVIDIA, CUDA and RAPIDS AI
NVIDIA doesn't need an introduction. It has become the leader in GPU space by timely tapping the market to reap the benefits of Deep Learning rise.
CUDA was invented by NVIDIA's as a general-purpose programming language for its GPUs.
In simple terms, it facilitates us to interact with the GPU core and utilize it to the max.
RAPIDS AI, an excerpt from the official docs
In simple terms, RAPID builds the simple programming wrapper to utilize the CUDA. Check this depiction from the official pageThe RAPIDS suite of open-source software libraries and APIs give you the ability to execute end-to-end data science and analytics pipelines entirely on GPUs. Licensed under Apache 2.0, RAPIDS is incubated by NVIDIA® based on extensive hardware and data science experience. RAPIDS utilizes NVIDIA CUDA® primitives for low-level compute optimization and exposes GPU parallelism and high-bandwidth memory speed through user-friendly Python interfaces.
 Since we are interested in Python. So let's discuss that. Again I will put an excerpt from the official page,
> RAPIDS projects include cuDF, a pandas-like data frame manipulation library; cuML, a collection of machine learning libraries that will provide GPU versions of algorithms available in Scikit-Learn
So, cuDF and cuML are the mappings of Pandas and Scikit-Learn. The best part is that the API is designed exactly like the two. So, using cuDF, cuML has no learning curve if you have used the two i.e. Pandas, scikit-Learn.
Let's jump to the code.
The Dataset and the Code
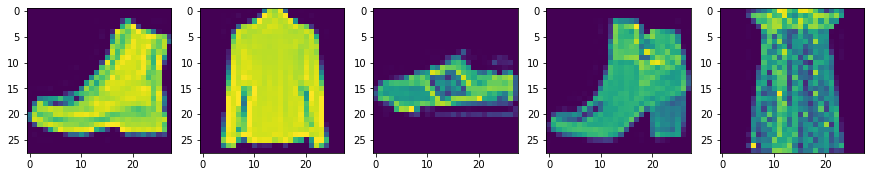
We will use the MNIST fashion dataset. It is a toy dataset for Deep Learning but will add a decent complexity for simple ML algorithms. It has 60K instances of low-resolution images of Fashion apparels.
Each instance is 28x28 i.e. 784 dimension which is a lot for a simple ML algorithm on CPU.
import tensorflow as tf
from tensorflow import keras
fashion_mnist = keras.datasets.fashion_mnist
((x_train, y_train), (x_test, y_test)) = fashion_mnist.load_data()

# scale data to the range of [0, 1]
x_train = (x_train.reshape(-1,784) / 255.0).astype('float32')
x_test = (x_test.reshape(-1,784) / 255.0).astype('float32')

_, ax = plt.subplots(1,5,figsize=(15,3))
img = np.random.randint(0, x_train.shape[0], size=5)

for id, img in enumerate(img):
    ax[id].imshow(x_train[img].reshape(28,28))
Code-explanation
All other parts of the code is quite trivial and self-explanatory.
Result
Let's train a LogisticsRegression with RAPIDS cuML and Scikit-Learn.
# cuML
from cuml.linear_model import LogisticRegression

model = LogisticRegression(penalty='l1', C=1)

%timeit -n 1 model.fit(x_train,y_train)

%timeit -n 1  y_pred = model.predict(x_test)
acc = np.sum(y_test == y_pred)/len(y_test)

# Scikit-Learn
from sklearn.linear_model import LogisticRegression

model = LogisticRegression(penalty='l1', C=1, solver='liblinear')

%timeit -n 1 model.fit(x_train,y_train)

%timeit -n 1 y_pred = model.predict(x_test)
acc = np.sum(y_test == y_pred)/len(y_test)
Code-explanation
All other parts of the code is quite trivial and self-explanatory.
Result
| Model | Fit time | Predict time | Accuracy |
| Scikit-Learn | 914s | 51.9ms | 84.2% |
| cuML | 3.61s | 41.5ms | 84.52% |
Look at the difference in the fit time i.e. almost ~250 times. In another way, you don't have to wait for almost 15 mins for the training to get complete. You can try multiple hyper-parms in that length of time with cuML.
Performance comparison - RAPIDS cuML and Scikit-Learn
We have only shown the code for one algorithm. You may follow the same and code for all other algorithms, i.e.SVM, KNN etc.
Check the official document and follow. [Link]
Here is the summary of other algorithms. Instead of the total time, we have mentioned the ratio of time taken by cuML and Scikit-Learn.
| Model | Fit Ratio | Predict ratio |
| SVC | 16 | 42 |
| RF#1 | 14 | 13 |
| KNN | 235 | 2500#2 |
| TNSE | TOO LARGE#3 | NA |
| LR | 253 | 1 |
Result-explanation
#1 - Depth was kept atmax_depth=10
#2 - In case of KNN, predict time is relevant since fit doesn't do anything
#3 - It was more than 2 hours for Scikit-Learn and just 2.36s for cuML
RandomForest and GradientBoosting
RandomForest was trained only with max_depth=10 because the model may goes OutOfmemory during training if very deep trees are built. This happens because each Tree resides in the GPU memory till training is completed and Deep trees need more memory. So, it needs a large amount of GPU memory.
Here is an excerpt from the official docs,
Very deep / very wide models may exhaust available GPU memory. Future versions of cuML will provide an alternative algorithm to reduce memory consumption.
GradientBoost is another very famous algorithm mainly due to its proven records in Kaggle and that is because of XGBoost (one of the State of the Art implementation).
Another SoTA implementation is LGMB(by Microsoft). It has recently got a lot of traction.
Point that I wanted to add here is that both of these implementations support GPU. That may be the reason cuML doesn't have a GradientBoosting implementation(I am not sure of the reason).
Scikit-Learn's HistGradientBoosting failed after consuming all the RAM(25GB). Below is the result of XGBoost.
| Model | Fit time | Predict time | Accuracy |
| XGBoost | 32.2s | 255ms | 77.2% |
Conclusion
This was all for this blog. Now you are equipped with another handy weapon to quickly try things on a larger Dataset on complex models e.g. TSNE. The best part is that we have decent GPU availability on Google Colab.
You can take this forward and try different models on even larger Datasets.
Check this list for different dataset. Benchmarking nearest neighbours
One of the downsides is that it is not natively supported in Colab and it takes almost 20 minutes to do all the setup.
Follow this Notebook to set it up in Google Colab. Link